TAB 2022 2학기 학회활동 [팀 스터디]
TIL 포스팅입니다.
작성자 : 38기_김민서
1.useState 사용하기 리뷰
const [ counter,setCounter] = React.useState(0);
위의 코드처럼 useState의 반환값 두개를 1.바꿔줄 변수 2.바꿔줄 변수를 다루는 함수 이름을 선언해줘서
사용한다.
여기서 setCounter와 같이 바꿔줄 변수를 다루는 함수는 크게 두가지 방식으로 사용한다
1. 인자로 변경될 내용 작성
setCounter(변수의 변경내용) 이런식으로 쓰는데
setCounter(10000)으로 정적인 데이터를 넣어주거나
setCounter(counter+1) 변수를 포함한 식으로 넣어줄수있다
2. 화살표 사용하기
setCounter((current)=>current+1);
사실 setCounter(counter+1)과 같은 표현이다.
근데 리액트에서는 더 안전하고 정확한 표현을 반환할수있는 표현식이라고한다!
"현재값"을 바탕으로 업데이트한다! 라는 표현이라 혼동을 주는걸 방지해주는 그런 확실한 표현이라고 한다.
2.사용자 Input으로 state 조절하기
노마드코더 강의에서는 단위 변환기를 만들어보았다 코드는 아래와같다
<!DOCTYPE html>
<html lang="en">
<head>
    <meta charset="UTF-8">
    <meta http-equiv="X-UA-Compatible" content="IE=edge">
    <meta name="viewport" content="width=device-width, initial-scale=1.0">
    <title>Document</title>
</head>
<body>
    <div id="root"></div>
</body>
<script src = "https://unpkg.com/react@16.7.0/umd/react.development.min.js"></script>
<script src="https://unpkg.com/react-dom@16.7.0/umd/react-dom.production.min.js"></script>
<script src="https://unpkg.com/@babel/standalone/babel.min.js"></script>
<script type="text/babel">
    function App(){
    	const [minutes,setMinutes] = React.useState();
        const onChange = () =>{
        	console.log("somebody wrote");
        };
        return(
        <div>
            <h1>Super Converter</h1>
            <label htmlfor="minutes">Minutes</label>
            <input
            value ={minutes}
            id="minutes"
            placeholder ="Minutes"
            type = "number"
            onChange ={onChange}/>
            <h4>You want to convert {minutes}</h4>
            <label htmlfor="hours">Hours</label>
            <input for="hours" placeholder="Hours" type = "number"/>
        </div>
        );
        const root = document.getElementById("root");
        ReactDOM.render(<App />,root);
    }
</script>
</html>
이 예제에서는 리스닝하는 이벤트자체가 onChange라서 딱히 setMinutes에 대한 설정은 안해줬다.
3.props
다음 강좌를 듣기앞서 구글링을 통해 먼저 props에 대해 알아보았다.
properties(속성)의 줄임말로 컴포넌트끼리 값을 전달할때 사용하는 얘이고
수정할수없다는 특징을 가지고있다
예제를 통하여 간단하게 props의 사용방법을 알아보았다
다음은 APP 컴포넌트에서 Main컴포넌트에 name으로 선언해준 프로퍼티를 넘겨준 예제이다
App.js
import React, { Component } from 'react';
import Header from './component/Header';
import Footer from './component/Footer';
import Main from './component/Main';

function App() {
  return (
    <div>
      <Header />
      <Main name="갓대희"/>
      <Footer />
    </div>
  );
}

export default App;
출처: https://goddaehee.tistory.com/300 [갓대희의 작은공간:티스토리]
Main.js
import React from 'react';

function Main(props) {
    return (
        <div>
            <main>
                <h1>안녕하세요. {props.name} 입니다.</h1>
            </main>
        </div>
    );
}

export default Main;
출처: https://goddaehee.tistory.com/300 [갓대희의 작은공간:티스토리]
Main.js에서 props. name으로 앞서 name에 선언해준 이름을 불러오는 예제이다
create-react-app
node.js를 설치하고 npm 명령어를 이용하여
npm create-react-app 만들고싶은 폴더이름
을 치면 react 로고가 뺑글뱅글 돌아가고있을거다.
노마드코더 강좌에서는 일단 당장 사용하지않을 app.test.js나 css파일 등등 모두 제거하고
app.js랑 index.js만 우선 사용하고 필요없는거 다 삭제해서 아래와 같이 결과물이 나왔다.'
개인적으로 처음 react 공부할때 제일 어려웠던게(kotlin 처음배울때도 마찬가지로) 알수없는 파일이 막 있는게
굉장히 부담스러웠는데 날리니까 한결나았다 휴

index.html 여는것같이 습관처럼 js 파일눌렀는데 실행안되서 놀람..
실행할때는 터미널에 해당 생성된 폴더위치에서(폴더를 생성한 위치말고 생성된 폴더 내부에서!)
npm start를 치면된다.
+export 구문 추가해주기
앞선 5회차에서 html파일로만 작성해주던것과 달리
이제부턴 주로 컴포넌트 단위로 파일을 작성해주면된다.
따라서 파일을 서로 import 해오는 방식으로 적용하므로
맨 밑에
export default 컴포넌트 이름해당 구문을 추가해주어야한다.
proptypes 설치하기
앞시간에 봤던 propTypes는 따로 설치해야하는 설치방법은 npm i prop-types 혹은 npm add prop-types이다.
근데..
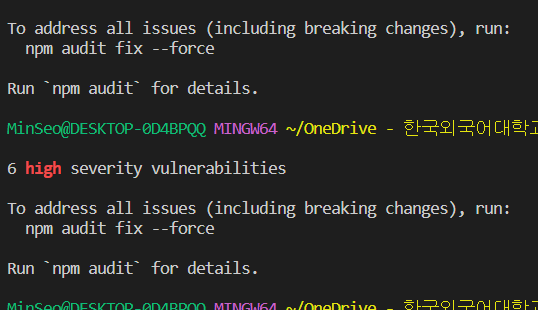
자꾸 이런 오류가 떴다ㅠㅠ
https://github.com/facebook/create-react-app/issues/11174
Help, `npm audit` says I have a vulnerability in react-scripts! · Issue #11174 · facebook/create-react-app
npm audit is broken for front-end tooling by design Bad news, but it's true. See here for a longer explanation. If you think you found a real vulnerability in react-scripts If you know that it ...
github.com
역시나 구글링해보니 나와 똑같은 사람이 있어서 package.json도 수정해보았는데 계속 나한테 6개 높은 취약점이 있다고 한다
-> 그냥 무시하고 실행하면 된다ㅇㅇ
style 적용하는법
style을 적용하는 방법은 크게 두가지가있다고 한다
여기에 버튼 컴포넌트를 생성하고, 여기에스타일을 적용하는 예제로 여러방식을 적용해보았다.
1. style.css import하기 / props로 style 설정
1-1 style.css import
//index.js
import React from 'react';
import ReactDOM from 'react-dom/client';
import App from './App';
import './style.css'
const root = ReactDOM.createRoot(document.getElementById('root'));
root.render(
  <React.StrictMode>
    <App />
  </React.StrictMode>
);
//App.js
import Button from './Button'
function App() {
  return (
    <div>
      <h1>Welcome react!</h1>
      <Button text = {"hi"}/>
    </div>
  );
}

export default App;
//Button.js
function Button({text}){
    return(
        <button>{text}</button>
    );
}

export default Button;

//style.css
button{
 color : white;
 background-color: tomato;
}
이렇게 style.css를 import하면, App 컴포넌트안에있는 버튼 컴포넌트이던 아님 다른 버튼이던 싹다 tomato 색깔로 될것이다
1-2. 컴포넌트 내부에서 스타일 설정
//Button.js
function Button({text}){
    return(
        <button
        style = {{
 		color : white;
 		background-color: tomato;
        }}>{text}</button>
    );
}

export default Button;
이렇게하면 다른버튼들은 토마토색깔은 면할수있다.
이에 더불어 앞서 props로 style을 전달해줄수도있다!
그치만..!미리 css 파일로 전달할수는 없는걸까?
2.style.module
//Button.module.css
.btn{
 color : white;
 background-color: tomato;
}

//Button.js
import styles from './Button.module.css'
function Button({text}){
    return(
        <button className = styles.btn>{text}</button>
    );
}

export default Button;
위와 같이 css 파일앞에 컴포넌트이름.module을 붙여주는것이다!
그러면 styles를 import해와서 위와같이 내가 원하는 버튼만 토마토색으로 만들수있다.
Effect
먼저 Effect의 필요성을 알기위해 전에 만들어봤던 counter 예제코드를 봐보자
import {useState} from "react";

function App(){
	const [counter,setValue] = useState(0);
    const onClick = ()=>setValue((prev) => prev + 1);
    console.log("is render?");
    return(
    	<div>
        	<h1>{counter}</h1>
            <button onClick = {onClick}>Click me</button>
        </div>
    );

}
참고로 앞선 함수들은 항상 React.이렇게 썼는데 이제는 creat-react-app으로 라이브러리 전체를 다 같이
가져와주니까 안써도된다
무튼 console.log를 통해 언제 render되는지, 해당 코드가 호출되는지 보면 버튼을 클릭할때마다
로그가 출력된다(당연)
하지만 만약 코드에서 다양한 api와 state코드가 같이있다고 가정해보자
그럼 api는 변화가 없는데 state 변화만 생겨도 render되버리면 좀 코드가 덜 효율적일것이다
이때 useEffect 라는 함수를 쓰면된다.
useEffect를 사용해서 위의 예제를 바꿔보자
import {useState ,useEffect} from "react";

function App(){
	const [counter,setValue] = useState(0);
    const onClick = ()=>setValue((prev) => prev + 1);
    console.log("I run all the time");
    useEffect(()=>{
    	console.log("Call the API..");
    },[]);

    return(
    	<div>
        	<h1>{counter}</h1>
            <button onClick = {onClick}>Click me</button>
        </div>
    );

}
이렇게 해서 버튼을 우다다 눌러보면 useEffect 내부에 써준 call the Api..구문은 한번만 찍힌다.
여기서 조금 더 응용을 해보면 아래와 같이 검색기능을 추가한 예제가있다고 해보자
import {useState ,useEffect} from "react";

function App(){
	const [counter,setValue] = useState(0);
    const onClick = ()=>setValue((prev) => prev + 1);
    const onChange = (event)=>setKeyword(event.target.value);
    console.log("I run all the time");
    useEffect(()=>{
    	console.log("Call the API..");
    },[]);
    useEffect(()=>{
    	console.log("SERACH for",keyword);
    },[]);

    return(
    	<div>
        	<input value ={keyword}
            onChange = {onChange}
            type="text"
            placeholder="Serach here"
            />
        	<h1>{counter}</h1>
            <button onClick = {onClick}>Click me</button>
        </div>
    );

}
이렇게하면 input에다가 값을 입력할때뿐만아니라버튼을 클릭해도 Search for 이 log로 찍힌다(띠용;;)
그 이유는 화면에서 state가 변화가 있을때마다 useEffect를 호출하기 때문이다
그래서 버튼을 클릭하면 counter값이라는 state가 바뀌는거 니까 log가 찍혀버린다.
이때 우리가 아직 사용하지않았던 두번째 인자를 사용해주면된다
import {useState ,useEffect} from "react";

function App(){
	const [counter,setValue] = useState(0);
    const onClick = ()=>setValue((prev) => prev + 1);
    const onChange = (event)=>setKeyword(event.target.value);
    console.log("I run all the time");
    useEffect(()=>{
    	console.log("Call the API..");
    },[]);
    useEffect(()=>{
    	console.log("SERACH for",keyword);
    },[keyword]);
    return(
    	<div>
        	<input value ={keyword}
            onChange = {onChange}
            type="text"
            placeholder="Serach here"
            />
        	<h1>{counter}</h1>
            <button onClick = {onClick}>Click me</button>
        </div>
    );

}
저 대괄호안에 대상이되는 state를 적어주면 끝!
'22 - 1학기 > 팀 스터디' 카테고리의 다른 글
| [웹 FE 스터디] 3.6~6.4 (0) | 2022.11.03 |
|---|---|
| [웹 FE 스터디] ReactJS ~ 3.5 (0) | 2022.10.06 |
| [웹 FE 스터디] REACT ~3.5 (0) | 2022.10.06 |
| [웹 FE 스터디] THE BASICS OF REACT ~ 3.5 Inputs and State (0) | 2022.09.29 |
| [React] Vanila JS vs React Js | JSX (1) | 2022.09.29 |

